Dynamics 365 Customer Engangement (formerly Dynamics CRM)
Visit dynamicscrm.dk for an in-depth walkthrough
This page will be concerned with technical documentation of the Dynamics 365 integration. To download the solution file and learn more about the specific features in CRM, please visit our dedicated website at DynamicsCRM.dk
Lasso is fully integrated into Dynamic 365 Customer Engagement (formerly known as Dynamics CRM). This means that you can experience Lasso visually in the same way as if you were using the Lasso portal. Here's is a quick overview of the main functionality:
- Quickly create Accounts and Leads by searching CVR.
- View all Lasso modules for Accounts, Leads and Contacts, directly from their respective forms.
- Access Målgruppesøgning directly from CRM and import Accounts or Leads while also adding them to Marketing Lists.
- Use our Workflow Plugins to enrich your data and give your workflows super-powers!
Customizations
You can customize various aspects of the integration with Dynamics 365. Use the Table of contents to find what your looking for, or simply read on below. If a customization is not available in older versions, it will be noted in the description.
For most customizations you will have to edit the Lasso Configuration File webresource. Here's how to do that:
-
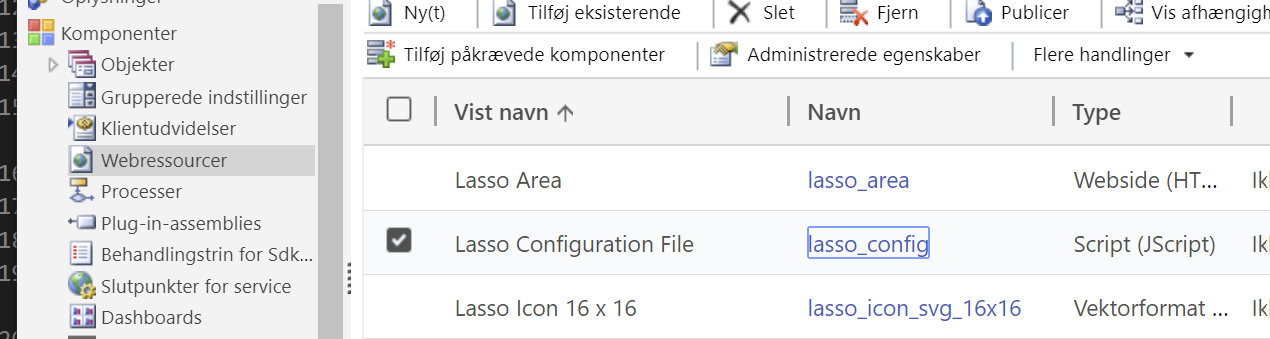
Locate the "Lasso Configuration File" web resource by going to Settings > Customizations > Customize the system. Under Components in the menu to the left, select Web Resources. Double click the web resource.
-
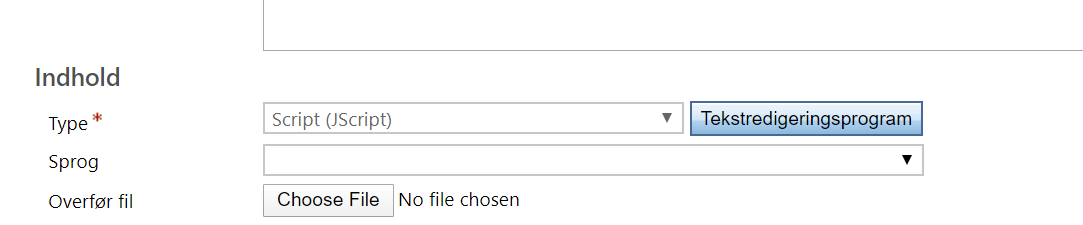
Click the "Text Editor" button to begin editing the configuration file.
Always open Lasso when creating Accounts or Leads
This feature is available from version 3.0.0
Normally the user will have to click the Lasso tab to open the Lasso quick-create module. You have the option to automatically select the tab when creating an Account or a Lead.
In the Lasso Configuration File webresource, locate the window.lasso.config.configurations section. To automatically expand Lasso on create, set the value next to showLassoOnCreateAccount and showLassoOnCreateLead to true, for Accounts and Leads respectively.
If you have upgraded from a previous version without this section, you can add the following to the end of the file.
window.lasso.config.configurations = {
    showLassoOnCreateAccount: true,
    showLassoOnCreateLead: true
};
Force the user to use Lasso when creating Accounts or Leads
This feature is available from version 3.0.0
This settings will make sure that Lasso is this only visible tab on the form during creation of Accounts or Leads, thereby making sure that the user does not manually type in (potentially wrong) data.
In the Lasso Configuration File webresource, locate the window.lasso.config.configurations section. To hide other tabs on create, set the value next to forceLassoOnCreateAccount and forceLassoOnCreateLead to true, for Accounts and Leads respectively.
If you have upgraded from a previous version without this section, you can add the following to the end of the file.
window.lasso.config.configurations = {
    forceLassoOnCreateAccount: true,
    forceLassoOnCreateLead: true
};
Set up field-mappings
When an Account, Lead or Contact is created in CRM by Lasso, fields are populated with data from e.g. CVR. Only a few fields like Name and Address are mapped per default, but you have the option to map more fields if you wish to do so. Here's how:
Locate the mapping section pictured below, starting from line 4.
window.lasso.config.customMappings = {
    company: {
        account: [
            //{ source: 'localIdentifier', target: 'mit_cvr_felt' },
            //{ source: 'primaryIndustry', target: 'mit_branchekode_felt' }
        ],
        lead: []
    },
    person: {
        contact: []
    }
};
As you can see there are already two field-mappings from a Company to an Account, but they have been disabled using
//.
Available source fields
address1: "Rådhuspladsen 37"
address2: null
city: "København V"
companyType: "Aktieselskab"
country: "Danmark"
email: "kontakt@lasso.dk"
employeeCount: 16
employees: "10-19"
entityType: "Company"
fax: null
houseLetter: ""
houseNo: "37"
lassoId: "CVR-1-34580820"
localIdentifier: "34580820"
localIdentifierTypeName: "CVR-nummer"
municipality: "KØBENHAVN"
name: "LASSO X A/S"
postalCode: "1550"
primaryIndustry: "Databehandling, webhosting og lignende serviceydelser"
primaryIndustryCode: "631100"
secondaryIndustry: "Konsulentbistand vedrørende informationsteknologi"
secondaryIndustryCode: "620200"
statusCode: "NORMAL"
statusText: "NORMAL"
streetName: "Rådhuspladsen"
telephone: "71747812"
website: "www.lassox.com"
zipCode: "1550"
If you add multiple mappings do not forget to end each line with a comma , to make it valid JSON.
Here is an example of mapping the number of employees and the company industry to our own custom fields:
window.lasso.config.customMappings = {
    company: {
        account: [
            { source: 'employeeCount', target: 'new_Employees' },
            { source: 'primaryIndustry', target: 'new_Industry' }
        ],
        lead: []
    },
    person: {
        contact: []
    }
};
Finally, don't forget to save and publish the changes. You're all done!
Field mapping tips and tricks
You can comebine fields from CVR using a space, like so:
{ source: 'streetName streetNumber', target: 'Address1_Line1' }
You can add a static value to a field using the value option:
{ source: '', target: 'Address1_Country', value: 'Danmark' }
Here Danmark will always be added to the country field in CRM.
Change the order of modules in the Lasso iframe
If you want to change the order of modules in the iframe, there's a way to do just that! Simply type in the wanted order of modules in the appOrder setting, in the Lasso Configuration File webresource under window.lasso.config.configurations.

The modules you add will take precedence over other modules, and remaining modules will follow in the default order. Here's an example:
window.lasso.config.configurations = {
    appOrder: ['information', 'cvrkeyfigures', 'news']
};
Click below to see of list of all the available modules. Modules not included in your subscription will be ignored.
Available modules
Dashboard: dashboard
Staminformation: information
Nøgletal: cvrkeyfigures
Ejerstruktur: cvrownership
Nyheder: news
Historik: cvrhistory
Tvilling: twinfinder
Rating: rating
Firmaindsigt: companyinsight
Revision: accountant
Finans: finance
KAM: kam
Reelt Ejerskab: trueownership

Skriv til hvis du mangler navnet på andre moduler, på support@lassox.com.
Preview a company before creating it
When creating a Account or Lead, it can be useful to preview the the respective company before creating it. This setting will add a preview link next to the create button, which will open a prefered Lasso module in a popup for previewing.
To enable, edit the setting companyPreviewApp in the Lasso Configuration File webresource under window.lasso.config.appConfigurations. Type in the module you want to open when clicking the preview link. See a list of available modules in Available modules in the previous setting.
window.lasso.config.appConfigurations = {
    lassosearch: {
        companyPreviewApp: 'information',
        companyPreviewMenu: true
    }
};
By setting companyPreviewMenu to true, a menu will be included in the popup to open other modules from the preview popup.
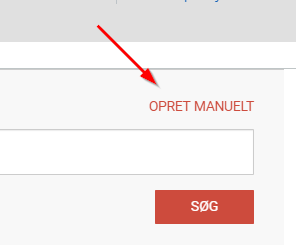
Allow a user to create accounts and leads manually
In versions earlier than 3.0.0, the user is forced to create accounts and leads using Lasso, but will be able to create them manually by clicking a toggle (link) in the quick-create module. From version 3.0.0 and up, this toggle is hidden by default, as forcing the user to create using Lasso is now an opt-in feature.
 Sometimes however, you may want to show or hide the toggle that enables manual creation, no matter the version you are running. To do this, you can add a setting to override the default behaviour.
To show or hide the toggle, edit the setting showCreateManually in the Lasso Configuration File webresource under window.lasso.config.appConfigurations > lassosearch. By setting to true, the toggle will be visible, and false will therefore hide it.
window.lasso.config.appConfigurations = {
    lassosearch: {
        showCreateManually: true
    }
};
Setup the Lasso iframe manually
Lasso is only enabled on default form for Accounts and Leads. In case you have a custom form, Lasso will have to be manually added. Don't worry, it's very simple.
- Open you form in edit mode and open the
Form propertieswindow.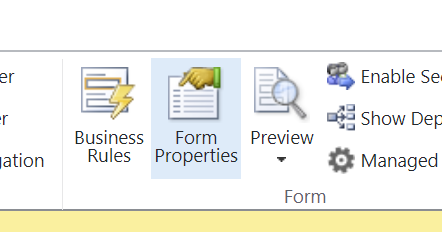
- Include the two scripts
Lasso LoaderandLasso Configuration File.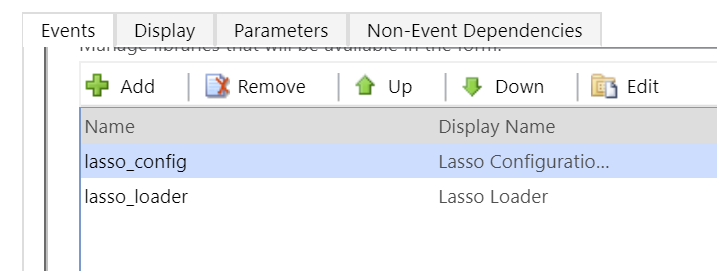
- Under
Event handlers, add the functionlasso.setupfrom theLasso Loaderscript and enable it.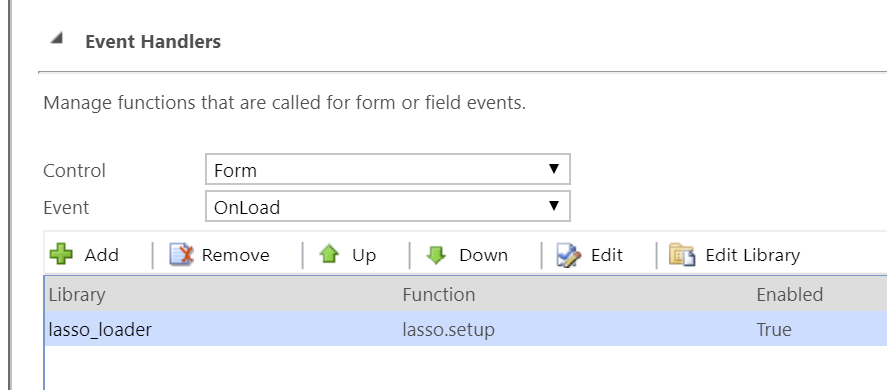
- Back on the form, include the
Lasso Idfield somewhere. Hide the field unless you have a need for it to be visible. - Add a tab with a section that has an iframe in it. Make sure to include the text
lassoin the name of the iframe, e.g. "iframe_lasso". You can se the iframe URL tohttps://apps.lassox.com/static/blank.html.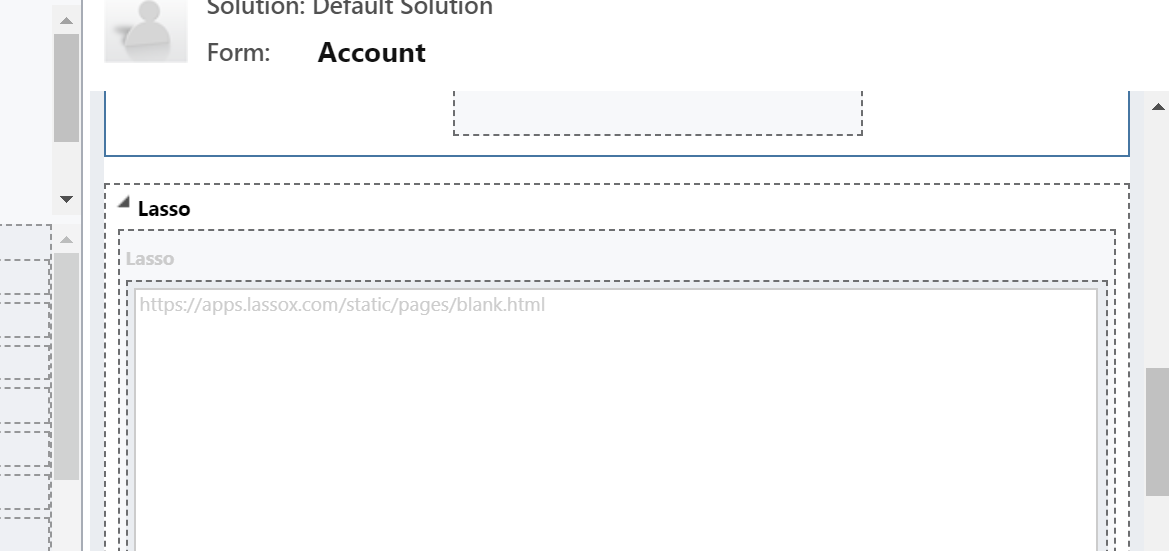
Are you using an earlier version than 3.0.0?
For older versions the process has a few more steps. Contact us at support@lassox.com for details.
That's it! Lasso should now load automatically in the new tab, when a Company or Lead is opened.
Do not forget to check out our Workflow Plugins if you wish to really power up your CRM with realtime data capabilities. See more at dynamicscrm.dk.